Bay Area to Yosemite, a day trip.
What most locals don’t realize is that you can drive to Yosemite and back in a single day from the Bay Area. We are pretty lucky when you think about it.
This means you can get the Yosemite Valley experience on a random Saturday or Sunday without camping. (a photo I took, click to enlarge)
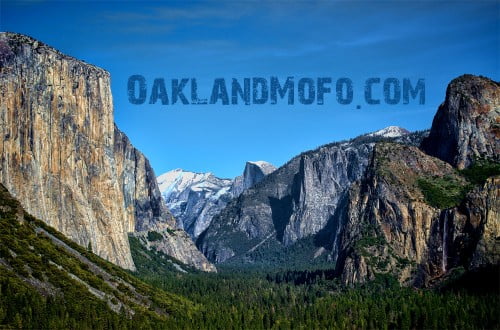
Pictured: Tunnel View Vista Point in Yosemite. Buy Print
El Capitan, Clouds Rest, Half Dome, Bridalveil Falls.
Why haven’t you gone yet? Well maybe because not everyone has the time or wants to go actual camping.
I myself as a kid went to Yosemite many times for weekend camping trips with my father, sister, and friends.
He was a mountain man and when he wasn’t busy camping with us kids he would go up to the Sierra Nevada backcountry with his buddy and hike and ski for up to two weeks at a time.
But that may be a little too much for most of us. Which is why a nice day trip can be a good start. But if you do plan on doing a day hike, be sure to check out this list of the best hiking equipment.
Day Trip To Yosemite
I found that if you wake up at 4:30am, leave at 6am, you can enter Yosemite National Park by 9am and be in the valley parked at Bridalveil Falls by 10am. So that is a 4 hour drive from Oakland to the waterfalls. Even though it takes 3 hours to enter the Yosemite gates, you will find that not even 2 hours into your trip you’ll be amazed by the Sierra Nevada foothills, breathtaking views off Highway 120, amazing tree lines and Redwoods along with the fresh smell of the outdoors. You will probably be enticed to stop at Don Pedro Lake Vista Point and I think you should.
The smell, the fresh outdoor smell, you just can’t believe how good it smells and that it’s all so real and vivid. You just feel healthy and more alive when you enter the Sierra Nevada’s.
[insert]
Trip Tips!
– The official Yosemite site says it takes about 4 to 5 hours from San Francisco. This is kind of right but I say it 4 hours driving at a normal pace.
– Leave as early as possible. No later than 6am. If a weekday leave even earlier to beat commute traffic.
– You will be driving into the sunrise, bring your sunglasses.
– There is a drive-through Starbucks in Oakdale about 1 hour and 30 minutes into the drive. I was able to leave at 6am, get my triple espresso there shortly after 7am saving time.
– Oakdale also has other food joints and drive troughs if you skipped breakfast.
– You may consider filling your tank in Oakdale as it could be cheaper than the Bay and the further past this you go the more expensive it may get.
– You’ll hit the gate around 3 hours. Once you hit the Yosemite National Park entrance gate you will still have about an hour drive down into Yosemite Valley.
Be prepared for a breathtaking view. If you’re crazy and leave the bay 3 hours before sunrise maybe you can see it here.
Yosemite Sights!
*Note* Use common sense when visiting any Yosemite sights. Many people die there every year. I think the current record is 20 deaths in 2011.
[insert2]
NEVER get in the water or climb on rocks at the top of a waterfall or upstream. This seems to be the main death cause. The water looks fine but it will eat you. DO NOT.
As for climbing the rocks at the bottom like I did, use your head. Some days you can clearly climb all the way and some days you can’t get near them. It will mostly depend on the time of the year. In the Springtime when the water is raging you will likely not be able to get near this. But in the Summer, Fall and maybe Winter you will likely have the opportunity to climb pretty far up the falls. Point being, use your head, do NOT go in the water or climb on slippery rocks. Especially on top of a waterfall.
Bridalveil Fall (click to enlarge)
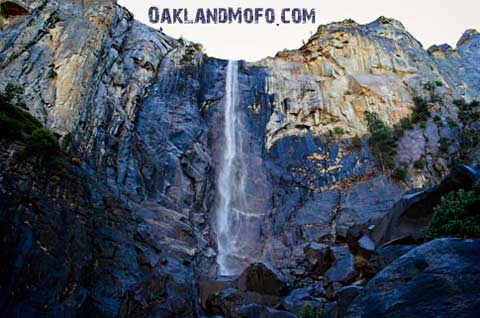
After making into the valley the first thing you will encounter is Bridalveil Falls. You’ll get there rather early and most tourists and campers may still be sleeping. You just park in the lot and follow the short trail. Once up there people will be crowded upon a small platform competing for pictures.
Fear not, jump over the little rock wall and climb up a little. Obviously you want to do this with caution and stay out of the water. But even with the water flowing pretty good you can usually get pretty far up the rocks of the waterfalls. In the summer when it is at its minimum you can even stand under it and watch it wave in the wind like a brides veil.
[youtube]
Cook’s Meadow
After you leave Bridalveil Falls, head towards Yosemite Village and you will drive alongside the Merced River. On your left will be a breathtaking view of Yosemite Falls and a big open meadow misting in the morning sun. This meadow parking pullout zone will be obvious, full of people, have an amazing view of El Capitan alongside Yosemite Falls and call out for you to pull over. Do it. (click to enlarge)
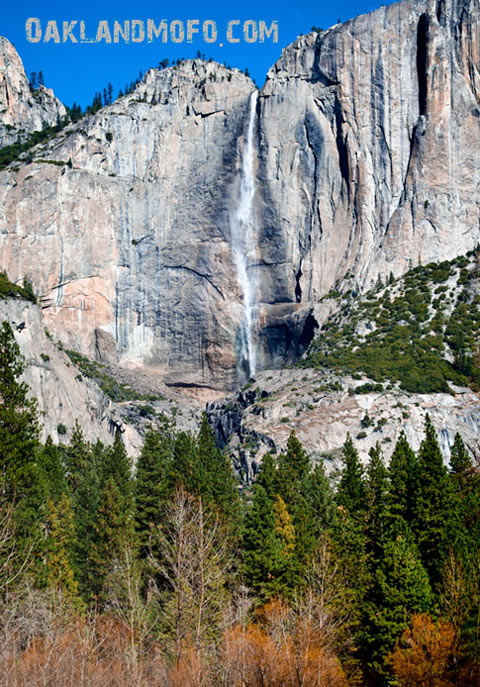
Yosemite Falls is the tallest waterfall in North America at 2,425 ft. and is composed of 3 parts. Upper Yosemite Falls, Middle Cascades and Lower Yosemite Falls. This photo just upper Yosemite Falls. You’ll see the rest later.
Yosemite Village
You might want to stop at the Yosemite Village Store and Gift Shop before you go to Yosemite Falls. By now the sun is coming up and the weather is hopefully getting warmer so you’re going to want to spend a nice amount of time in the sun at Yosemite Falls. Better grab some picnic supplies! There is a grocery store in Yosemite Village that also doubles as a gift shop. So if you want a Half Dome shot glass, key chain or a Yosemite shirt you should stop by. The grocery store is heavily stocked, not that expensive and they even have alcohol.
Yosemite Falls (click to enlarge)

After leaving Yosemite Village you’ll head down to Yosemite Falls. It is a short walk from the parking lot to the waterfall bridge. Depending on the time of year and amount of water you will be able to climb pretty far up the rocks and hang out near the base of the waterfall. You will see many people doing this and it won’t feel as awkward as when you did it at Bridalveil Falls alone at 10am.
The bridge is only a short walk from the parking lot. You’ll want to cross the bridge and start climbing the rocks towards the base of the waterfall. By this time it will likely be full of others doing the same.
Find a nice big flat rock, have a picnic in the mist of the waterfall while being amazed.
When you look back after climbing the rocks it will look something like this. It really is the perfect spot for a mid afternoon Yosemite picnic.

The walk there and back is very pretty as well. Most of the valley’s walls are lined with massive fallen rocks and beautiful redwood trees like this. (click to enlarge)

Tunnel View Vista Point
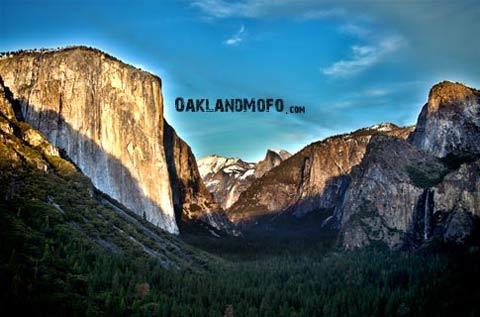
You would be a fool to go to Yosemite and not go up to tunnel view for a quick mind-blowing view. This is where you can really sit and suck it all in. Massive mountains, giant domes, blankets of redwoods, waterfalls, the list goes on. Tunnel mutha effin view(Google Street View). This is actually a great spot for a sunset as you can see here. But it is a constant destination and will always be populated. So you may want to go somewhere else for sunset. (click to enlarge)
Badger Pass / Sentinel Dome
You may now have noticed that I went to Tunnel View twice. Once in the day on the way up the mountain and once for sunset on the way back down towards the exit.
Your last stop will hopefully be Sentinel Dome, the 1-mile hike to the top. I found out the hard way that the road was closed due to snow. However, Badger Pass Ski Area was open and there was snow to be played in everywhere. So, you can go from the almost too hot valley floor to the top and play in the snow. You can actually ski at Badger Pass in the winter. They have rentals as well.

(click to enlarge) Notice the tiny human skiing down past the humongous tree line. Yeah, it’s like that.
Easy Driving Directions:
Getting there is really simple and you even have multiple routes, the 120 or 140. We’ll take the 120. It’s pretty.
I’m going to assume you know how to get to 580 from anywhere in the Bay so we’ll start on interstate 580 in Livermore.
580 East out of the Bay towards the Altamont Pass Windmills.
580 turns to 205, take 5 North.
From 5 North you’ll exit Highway 120 Yosemite.
That’s pretty much it. Pay attention and follow the 120 signs. They are clear and posted when needed for turns in town.
You’ll drive through a beautiful almond orchid laced highway, into the Sierra Nevada Foothills.
You’ll notice Google Maps says you can take 140 and get there sooner. This is debatable and I am not sure about that. The 140 gate and the 120 gate are not the same so I think this is counting the gate and not when you’re in the valley. Feel free to do either. In fact, I am going to do 140 next time and will report back to you.
If you take 120 you get Don Pedro Lake Vista Point and you get the option of taking Priest Grade Rd which is a super steep short cut instead of an 8-mile windy road.
Highway 120 is the higher elevation route maxing out at 6,100+ feet and then descending back to 4,000 feet so depending on the time of year you may encounter snow and or have to take 140, the 4,000 feet route into Yosemite Valley. Check weather conditions for snow on 120 before going.
Old Priest Grade Road Shortcut
If you take Highway 120 you have the option of taking the Priest Grade Road shortcut cutting your time even more.
As you can see from this map it takes a direct 17% grade, 2.7 mile route with a 1,500+ feet rise in elevation right up the hill versus the long 8 mile route around. The longer route is beautiful but so is OPG.
There are several factors here so don’t just do it.
If it is hot out, can you car handle going up? Cars overheat on this thing all the time. Do not take a hooptie up or down this.
On the way down you must factor your brakes because they WILL get hot and if they overheat and burn out you will lose traction and not be able to stop. This is a common occurrence on OPG and if they go out you will be forced to head-on collision the mountain, a car in front of you or go off the cliff. Be sure to drive in as low a gear as possible to save braking power.
I recommend if you can handle it take it both ways. But going up the long way can be pretty as you see here. (click to enlarge)

Leaving Yosemite =(
Well, it’s something you have to do.
If you leave at sunset, add 4 hours and you’re home! But you’re likely going to want to get food somewhere, and you must see the stars. If you can hang with the drive and be up late I suggest you stay and try to watch the stars. Skip the food even, bring a few food bars to hold you over until you hit a drive-through in Oakdale. If you happen to be on Sentinel Dome for this, lucky you. But, fear not. If you MUST leave at sunset truth is it’ll take you an hour to get out of the valley up 120 and it will get darker and darker. I stopped at Don Pedro Vista Point for a moonrise shown below. The stars were so intense before the moon came up that I could take pictures of them! (click to enlarge)
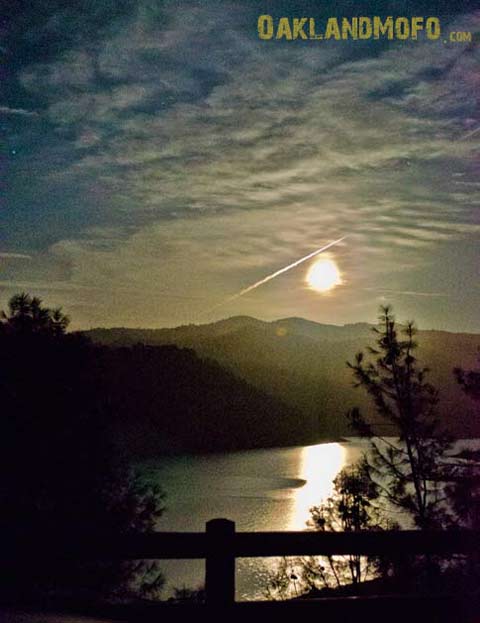
That is the moon rising over Lake Don Pedro just outside of Yosemite on the Highway 120 route. (click to enlarge)
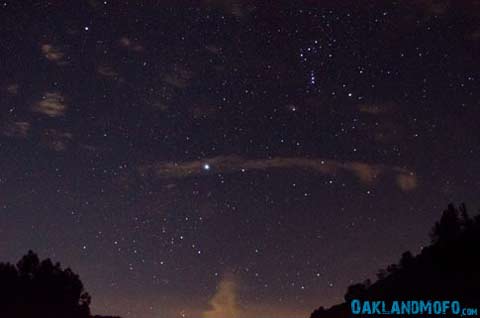
Here you have Orion’s Belt. That was my first time attempting a photo of the stars. I’ve never had a camera that could capture this. I hope to get better ones next time.
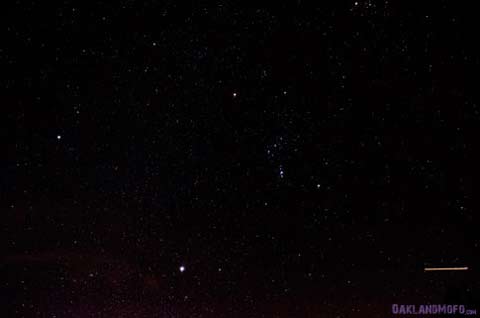
I took this shot first actually with a longer exposure and there are so many stars that it’s hard to find Orion’s Belt.

I decided to try it with a car going by and got this awesome photo.
Camping In Yosemite
These days getting a campsite in Yosemite can be quite the task and requires planning months in advance. If you manage to seal some dates via the reservation system then you are in for a treat. When you have a full few days you get to experience it all, even the night sky. You can plan a full day hike such as Yosemite Falls or down to the valley from Glacier Point.
Upper Yosemite Falls Trail
You gotta make it to the top of Yosemite Falls. The tallest waterfall in Northern America. I admit I have not yet and am doing this first thing in the Springtime when the falls are at full capacity. I just learned there is a tight rope on top of the falls too. Not like I could go near that thing but WOW.
The trail itself is a steep 2,700 ft. climb over 7.2 miles. It is suggested you give yourself 6 to 8 hours for this adventure. It can still be done in a day trip, just maybe not your first-day trip if you want to do the other stuff. I plan on doing it on a day trip.
El Capitan Rope Swing!!!
Yes, that is right, Can you even believe it? I can’t and I’ve been to Yosemite many times. I have read drama on the Yosemite local boards and see some want it removed, some don’t know where it came from and some claim it is maintained and has even been replaced. Of course, as always it is a use at your own risk thing. You could die. It is also on my Spring trip list. Hope I survive!
Sentinel Dome Hike
This is a quick easy one and it will place you on one of the tallest peaks in the valley and it will give you a 360-degree view of Yosemite. The hike is only 1.1 miles each way. Well worth it.
This one is only accessible when the snow has melted so typically May-December but always check Badger Pass for conditions. Getting to the top of Yosemite Valley via this 1-mile hike is almost like using a cheat code.
Glacier Point Four Mile Trail
This 4.8-mile trail starts at the top of the valley offering breathtaking panoramic views of Yosemite Valley all the way down. It is recommended that you take the hikers bus from the valley floor to the top and then hike back down to your car or campground. Give yourself 3 to 4 hours. This trail is closed during the winter because Glacier Point is closed past Badger Pass.
Climb Half Dome
This is something I have always wanted to do. But I tell you the videos I have watched recently kind of scare me. Cables or not, that is a vertical climb with a bunch of randoms in front of you. Half Dome has had an increase in deaths over the last few years. In fact Yosemite in general has had a rise in deaths. But it’s always best to know before you go!

Yosemite Information
Current Conditions and Road Closures – Always check first.
Camping Reservations – Make them months in advance.
Panoramics – Extreme High Resolution & Zoomable!
Yosemite Maps – A large collection of historic Yosemite Maps.
Yosemite Supplies Checklist
Hiking Sticks – Believe it or not these are going to make your life a lot easier when going on day hikes no matter how tough you think you are. You’re almost going to feel silly being the only one out there without them.
CamelBak – The one thing you want to make sure you have plenty of is water. CamelBak is the leader in this field.
A Hat – It’s hot and sunny sometimes and this could make or break the way you feel the next day.
Food Bars – Lightweight, yummy, cheap, easy and energy supplying. Don’t get hungry on the trail.
Survival Kit – You just never know.
And some other obvious items such as sunscreen, sunglasses, a camera, binoculars, water, etc.
Amazing Yosemite Time Lapse.
You’re going to love this time lapse.
Awesome Yosemite Flood Video.
I have always wondered what a flood in Yosemite Valley would look like, and this sums it up pretty good. So awesome.
I hope you enjoyed the article, learned something, are going soon, will comment, share and subscribe below for more adventures and local information.
Dedicated to my father, RIP(he took me to Yosemite many times as a kid).

Suji says
We are doing a two day trip, leaving 6 am from Oakland using your itinerary, but would like to stay for one night, where do you recommend we stay? Thanks
OaklandMofo says
Unfortunately camping there requires making reservations months in advance.
You can try for the first come first serve but don’t even think that will work out because it won’t.
I happen to know a secret long road outside of the park that you can openly camp in. I found it one late night and there were people camping about every quarter mile on this road.